A template in WebCenter (or an ADF application) is nothing more than a JSPX page with additional tags to define some regions. This means that you can use all the existing ADF or WebCenter components in your template.
Before we begin we must create the template JSPX file. In WebCenter, all templates should be added to the pagetemplates folder. If you don't do this, your template can not be used during runtime.
- Create the JSF Page template as shown below
Every template contains facets. A facet can be seen as a region in a template. It defines a section of the template that can be uses by other pages. You will create facets for each region that can be modified by the pages using this template. In our case, we don't allow the other pages to modify the header, footer and so on. We only allow them a section to insert their own content.
In WebCenter, a template should always have a facet called content. This facet will be used by the composer to make the page editable during runtime. Without the content facet, the composer can't do anything on the page so must add it.
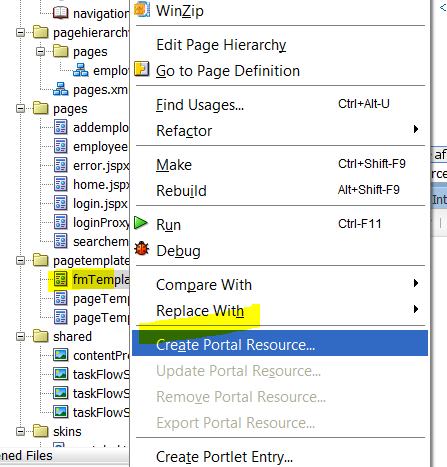
- Modify the newly created template as per your requirement, After updating required changes to the template, then right click on template and choose 'Create Portal Resource' option as shown below. This will make available for the portal, so that we can use this template at runtime.
- By default, this newly created template will be in 'Hidden' status, you have to make it 'Available'. this can be done by
- Select the template, choose 'Edit' button then choose 'Show' button
- To make the newly created template as default template, then select 'Configurations' tab, choose the template that you want to make it as default as shown below.
- You don't need to worry about 'Saving' these changes, by default all your changes will be automatically saved.
- If you get any NPE(Null Pointer Exception), ensure you have to generate the page definition file for newly created template.
- If you want to make the newly created template should be default template for your entire application, that means whenever you create new page that will extends to this template, you have to open 'adf-config.xml' and modify the below highlighted entry to the template whatever you want.
- If you want to modify already created pages, then open the page and modify the 'pageTemplate' attribute.